
How to Submit Your Website to Google
Google Search Console provides an easy and convience way to submit your website to Google.
Search Console gives Google site data like sitemaps of all your pages. This will help Google crawl and index your pages better for search results.
In this article, we will learn how to submit your website and sitemaps to Google using Search Console.
Why Submit to Google Search Console?
Let's take a quick look at some of the benefits of including your website in Search Console before jumping into the submission process:
Get Indexed Faster
Google is constantly on the lookout for fresh content. Yet new sites don't always get indexed quickly. It is much faster when you submit your website to Google's Search Console.
Instead of having to wait weeks or months for Google to find you, by putting your website in Search Console, your telling Google "Hey, we're here! Come crawl our content!"
Fix Technical SEO Issues
Search Console helps you resolves technical SEO issues like duplicate content and indexing errors. Once you're aware of these problems, you can fix them quickly and your site will be more search-friendly.
Without Search Console, you may not know about these SEO technical issues. This allows you to see how Google views your site.
See Keyword and Traffic Data
Search Console offers you website stats including:
- Which keywords and phrases that drive the most traffic to your site.
- Google search page views and impressions from your pages.
- Google-indexed pages vs. pages not crawled.
This gives you insight into keyword research and enables you to tailor your content to searcher intent.
Here is how to add your site to the Google Search Console:
Step 1: Register Your Website in Search Console
First, you need to create a site property on Google Search Console. Here's how:
Register to Your Google Account
Open Google Search Console by using your Google account.
If you don't have a Google account already then you will have to sign up for one.
Click "Add Property"
After you login, you will be taken to your Search Console home page. Look for the button to "Add your first property". Click on "+ Add property."
This will set up the process to publish a new website property to your Search Console account.
Enter Your Website URL
Then put your site URL into the box and click "Continue".
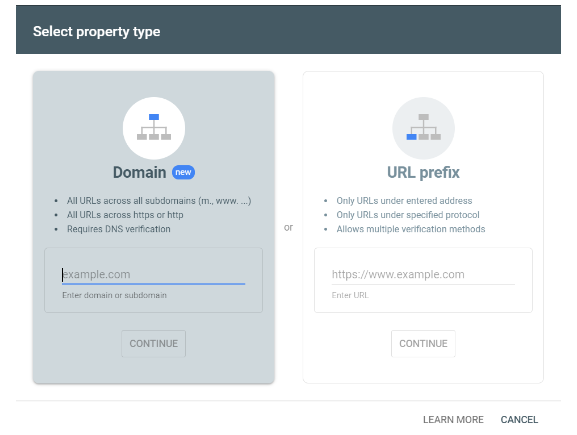
You can choose the top level domain (ie - example.com) or specify a subdomain (ie - blog.example.com).
Always include http:// or https:// in your URL.
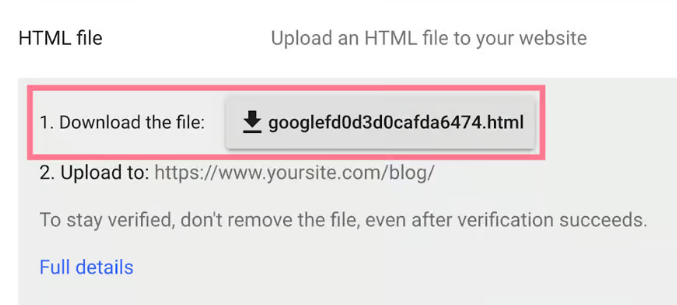
Select an HTML Verification Method
Google will ask for proof that you own the site and for you to provide that proof. Here is the easiest way to check the HTML file.
Click the "HTML tag" radio button.
This will give Google you a meta tag to add to your page code.
Verify Ownership
Login to your website and copy the HTML verification tag Google gave you. Copy it and paste into your web page's header.
Once added, return to Search Console and click "Verify". Google will visit your page, look at its verification tag, and they'll see you own the website!
Complete Registration
Your website property will be added to Search Console when you verified as the owner.
Now that Google knows about your website it can start indexing your pages.
Step 2: Submit Your Sitemaps
Sitemap is an XML file that will list all the URLs you want Google to index on your website. And indexing is that much easier when you have a sitemap.
Here's how to develop a sitemap and push it to Search Console:
Generate a Sitemap
If you have a WordPress site, you can automatically create a sitemap with Yoast SEO.
For the other platforms, manually create it using a sitemap generator.
When finished, add your sitemap XML file to your site (example - https://www.yoursite.com/sitemap.xml)
Open Search Console's Sitemaps Tab
Select your Search Console property from the "Index Coverage" drop-down on the left.
Then open the "Sitemaps" tab. This is where you'll type your sitemap URL.
Submit Your Sitemap URL
Type the URL of your sitemap in the field.
For example, https://www.yoursite.com/sitemap.xml
Click "Submit" and watch your sitemap begin crawling!
Monitor Your Index Coverage
There is an index coverage check on "Coverage". It shows how much of your website Google scanned and if it has found any errors.
Get 100% index coverage so that all your pages are indexed. Clear out 4xx or 5xx status codes that prevent google crawling urls.
Posting a sitemap also allows Google to know what URLs to index.
But, if you don't have a sitemap or need a new page to be indexed quickly?
Submit Individual URLs
A sitemap is what contains all your website URLs when you submit to Google. But even with a sitemap, pages take time to be indexed and crawled when they are changed or added.
If you have a high value page that you want Google to crawl quickly, you can inspect the URL Inspector.
Here's how it works:
Navigate to URL Inspection
From your Search Console property, go to "Coverage" and click URL Inspection in the left navigation.
Enter the URL to Inspect
Copy your new page's URL and paste it into the text box and press enter.
Check the Inspection Results
Search Console will let you know whether or not it's indexed. There is a "Request indexing" you can see in the image below. Click to index the URL.
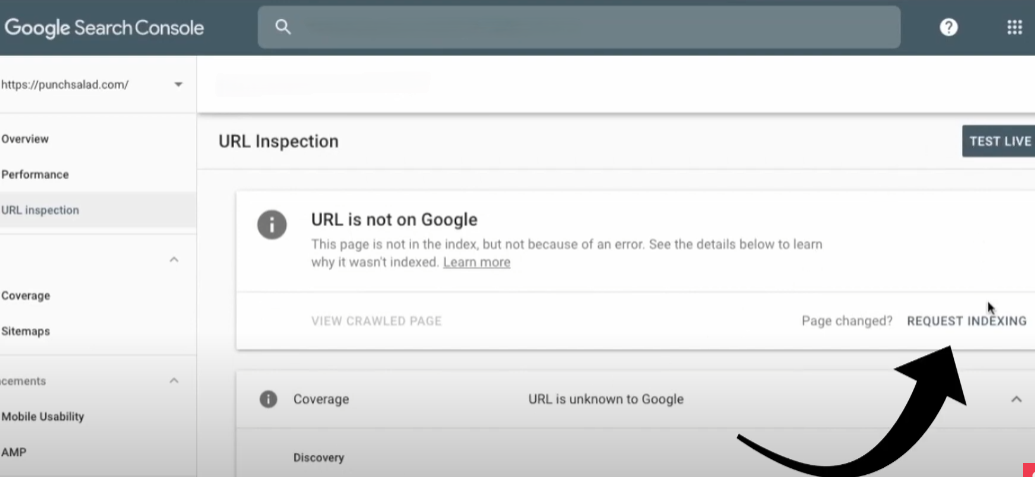
That's when Google will add the URL to it's priority crawl queue.
It only takes a few seconds and beats waiting days or weeks!
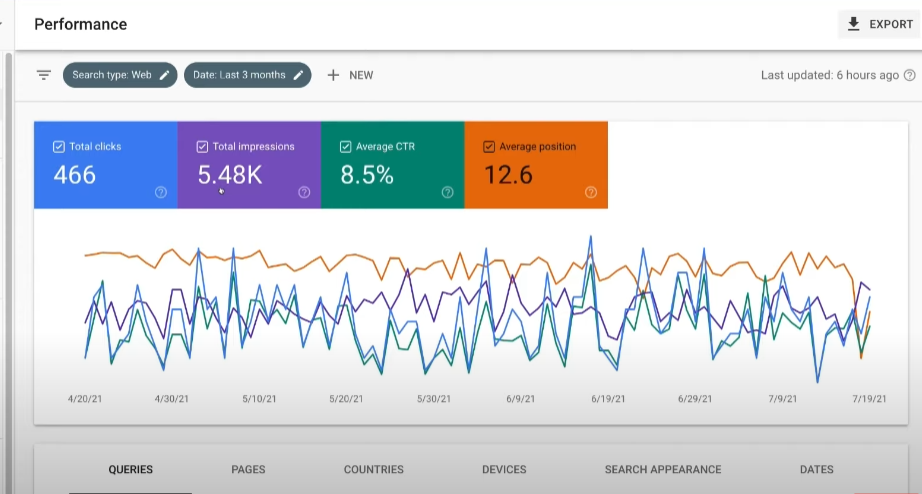
Monitor Your Search Traffic
Once you submit to Search Console, you will see useful search metrics under the "Performance" tab:
- Impressions - How many times your pages were shown in Google searches.
- Clicks - How many users clicked on your listing and visited your website.
- Average Search Position - Average search rank of your URLs in the search results.
- Recently Trending Searches - Keywords that bring people to your site.
Review this information to find out what pages are successful and which ones are not. And then refine that content to be a more useful to searchers.
This Search Console data should guide your SEO, so make sure you are taking note of it often.
Final Thoughts
Now you know how to submit your website to Google!
Search Console is loaded with useful SEO data so take advanage of the information provided to improve your ranking.